Showing posts with label christmas. Show all posts

Monday, 23 December 2013

Christmas wrapping sensory play

This fun sensory table is a great way to have fun with things that you'll have have lying around the house at this time of year. It's a great way to keep kids entertained before they get their presents!


I set up  a table with some Christmassy bits and bobs. I used a snack tray to separate the items out and make them look more inviting. I tried to include a range of textures (all in Christmas colours). You could include what ever you have and are happy for your child to play with. All our decorations are potentially breakable but if you had some sturdy ones you could add them too.

I covered the table in wrapping paper added some sticky back plastic (contact paper) to the table sticky side up to hold the items in place (this is an optional extra you could still play with the items without this).


The Frog then arranged and re arranged the items for ages. It was lovely to see him concentrate on an activity for a prolonged period because like most 2 year olds his attention span can be short.


He loved putting similar items (e.g. pom poms together) and then rearranging them.

** as the items in this activity are not toys please only let you child play with what you think is appropriate for their age, please also ensure they are appropriately supervised **

Language Links:
Vocabulary: names of items, soft, shiny, bumpy
Other skills: developing concentration span (EYFS links- Communication and Language: Listening and attention), categorising objects according to property (EYFS- Mathematics: Shape, space and measure)

Thursday, 5 December 2013

Homemade fingerprint Christmas cards

Have you got your Christmas cards yet ? We've made some handmade cards based on the nativity story.


finger print nativity card


The base of the card is really simple - a fingerprint. We're quite big fans of hand print / finger print art (as you can see from our autumn tree, spring tree and handprint birthday card).

fingerprint card

After a finger print we added different details and embellishments to make the different characters in the story. 

fingerprint nativity scene

For Mary and Joseph I added a brown and blue body as well as head scarf. Baby Jesus had a bed of straw made from cutting a fringe into a piece of yellow a.d a crib made from corrugated card.

The angel had silver wings (drawn on with one of these markers - which I love  http://www.amazon.co.uk/Pilot-Silver-Marker-extra-point/dp/B0017TMLAK) and a body made of glittery card.

fingerprint angel

The shepherds had bodies similar to Joseph and a white finger print which I turned into a sheep.
fingerprint shepherds

Finally the wise men had brightly coloured bodies, hand drawn crowns and stick on sequins for gifts.
fingerprint three kings

If your after other ideas for homemade Christmas cards check out this rather cool hangout (see if you spot us!) https://www.youtube.com/watch?v=WntF78jdcXs

Tuesday, 8 January 2013

Playing with wrapping paper

After having such a great time with our wrapping paper sensory box I decided to save some of our left over wrapping paper from our Christmas presents to play with. Here's what we did, such a great resource (and its free!)


Paint is a big favourite in our house. The Fairy especially loves to print. Scrunching up the paper and using it to print made great patterns. We also tried printing with bubble wrap. This was a great excuse to use language to reason and predict; will the pattern be the same when you print with paper and then with bubble wrap, what might it look like?


Scissors are another big hit in our house. We have a collection of old cards and scrap paper the Fairy can cut. She'd cut everything if she was allowed - I'm hoping providing her with constructive opportunities to cut will mean she won't cut her own, or even worse her brother's hair! This wrapping paper with squares made a perfect excuse to have a go at cutting.


I made some simple 'cards' by cutting different patterned paper out - perfect for a game of pairs or snap.


Did you play with your left over wrapping paper? What did you do?

Wednesday, 19 December 2012

Christmas the Spanish way (well Spain-glish)

Welcome to today's Christmas around the world post. This is part of a series of post on different blogs organised by Living Life Intentionally.  Click on the logo to take her introduction of the series plus links to all the other blogs (there's also a free e book of activities).

 
Today we're visiting Spain. As regular readers of the blog know we're a bilingual and bicultural family as The Papa is Spanish. Here is some of the ways we add a Spanish element to our Christmas (so it's more Span-glish!)

The Nativity scene or Belen (literally 'Bethlehem'). In Spain the traditional nativity includes a lot more than just Mary, Joseph, Jesus, shepherds, angel and kings. The whole town is included - craftsmen, bakers, washer women, children... the lot. We've got several Belenes in our house, two which we got when we got married and one which I made for the children to play with earlier this year. See how I made it. Perhaps I need to add more characters to our new Belen! 

homemade nativity

The giving of presents doesn't happen on the 25th Dec as in the UK. Instead 'Los Reyes' (The 3 Kings) bring presents on the 6th Jan. Children leave their slippers under the tree. If they have been good that year in the morning they are filled with presents  (if not they wake up to coal!) In our family we give the children their big presents at Christmas and have a few more stocking fillers on Reyes.

roscon de reyes

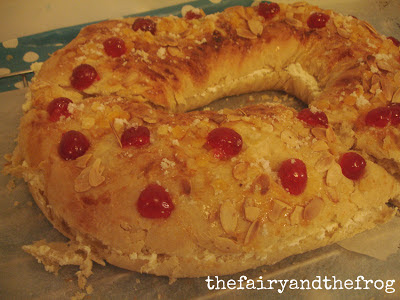
At Reyes a special crown shaped sweet bread is eaten. We based our recipe on the one from the Spanish food blog La Manzana dulche de Eva. Here's how we made ours


Friday, 7 December 2012

How to make Fimo Nativity figures

Its really important for us as a family that our kids know that Christmas isn't just about Father Christmas (Santa) and presents.

Like story boxes, using small world people to tell a story helps children to engage, interact and remember it. As well as using figures as story props you can let your child play with the figures and re-intact the story (great for developing communication skills). As out main nativity set is very breakable I thought I'd make some chunky nativity figures out of Fimo (polymer clay).

Here's how I made them...


The figures are based on a really simple ball for the head, with additions.


Mary, Joseph and the shepherd have head dresses.


The Kings have crowns and a little present.


The angel, wings and a halo.


Baby Jesus is wrapped in cloth and in a manger.

I wanted to keep the figures as simple as possible, partly to be practical (i.e. less bits means less bits to break off) but also to encourage imagination.

This post is part of a blog hop. Do you have a blog and a nativity themed post? If so link up below. Why don't you check out some of the other hosts on the hop.
The Imagination Tree
<div align="center"><a href="http://www.theimaginationtree.com" title="The Imagination Tree" target="_blank"><img src="http://rainydaymum.co.uk/wp-content/uploads/2012/12/focus-on-the-Nativity.jpg" alt="The Imagination Tree" style="border:none;" /></a></div>
The Imagination Tree Living Montessori Now Kindergarten & Preschool for Parents & Teachers My Nearest And Dearest Life At The Zoo Creative Connection for Kids This Reading Mama Adventures in Mommydom Train up A Child Rainy Day Mum 3 Dinosaurs Crafty Mom Share The Magic Of Play Sun Hats and Wellieboots The Fairy and The Frog Housing a Forest The Iowa Farmers Wife Preschool Book Club Craft To Art The Golden Gleam Here Come The Girls Mamas Like Me In Lieu Of Preschool Kids Creative Chaos My Small Potatoes Love Play And Learn Kids World Citizen

Thursday, 15 November 2012

How to make 3 easy handmade christmas tree decorations

Making handmade Christmas tree decorations with the kids is a great way to get into the Christmas spirit. Homemade decorations are a fun way to create memories through shared experience and get creative at the same time.

Before I had kids I was a bit of Christmas decoration snob - I like things to be coordinated and tasteful (although I've always been rather fond of sparkle and a bit of bling- but instigated in a coordinated fashion!) Post kids we've gone for the riotous look. Fantastically making you own decorations doesn't have to be hard. Check out 3 of our ideas below, which can be easily be tailored to your taste/ colour scheme.


Everyone needs a bit of sparkle. How about this simple pipe cleaner heart. The Fairy twisted the ends of the pipe cleaners together (under my watchful eye). Then I helped to bend them round to form a heart shape. Ta da, in less than a minute you have a heart.


If you regularly read our blog you'll know were fans of dough/ clay in all its forms. Salt dough and clay make great modelling materials for kids. The Fairy made this heart. I helped her make the hole (using a straw). When it was dry she painted it. We used pearlised paint which gives a lovely shiny finish.


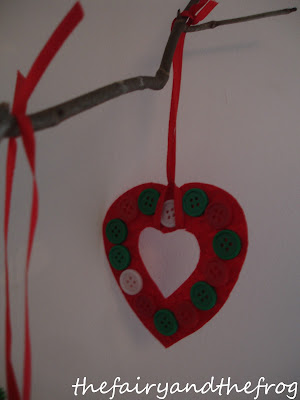
The last one needed a bit more adult help as we used big scissors. The Fairy selected buttons. I helped her to arrange them in a heart pattern on some felt (we used sticky buttons so they were easy to attach). I then cut the heart out and attached the ribbon.


Obviously we hadn't used enough sparkle as when I was out of the room putting the Frog to bed, The Fairy added a few more pipe cleaners. 'Its finished now mummy! she announced as I walked back into the room.


Language Links:
Vocabulary: heart, paint, twist, shiny, sparkle
Other skills: matching (buttons)

On the run up to Christmas I'm joining in with a group of fabulous kids bloggers to get into the Christmas spirit. Why don't you check out some of their ideas or link your ideas to the blog hop below.

Jennifer's Little World - http://www.jenniferslittleworld.com
Mummy..Mummy..MUM!! - http://www.mummymummymum.com
Life At The Zoo - http://www.lifeatthezoo.com


Tuesday, 13 November 2012

Craft with babyfood jars

Whenever I look at a baby food jar I think 'I could make something out of that'. I think it's the miniature appeal that makes them cute. Check out this collection of ideas for using baby food jars.


Want to teach kids about being thankful, how about this gratitude turkey from Toddler Approved.


When I saw this post by The Imagination Tree about how to make a glass lantern, I knew instantly that we should use one of many baby food jars in our craft cupboard to make a mini version.


Feeling Christmasy, check out these very friendly snow men from Inspired by Family.


Red Ted Art used baby food jars to make some very easy snow globes.

These lanterns also by Inspired by Family would make a great table centre piece.


Or how about some salt art?


Been visited from outer space - Train up a child used baby food jars to make these glow in the dark aliens.


We also love to use jars for sorting and storing.


Do you upcycle jars? What do you do?


Thursday, 1 November 2012

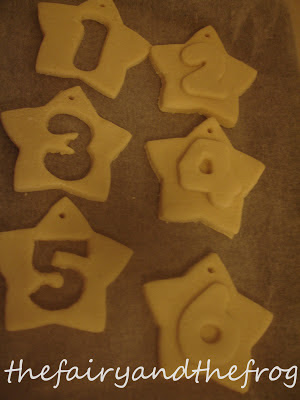
Salt dough advent calender


One of the things I love about the kids getting older is being able to do things with them I enjoyed as a kid (fortunately so far they seem to enjoy them too!) Salt dough featured highly in our childhood so it's not surprising that when thinking about how I could make an advent calender salt dough sprung to mind.

advent calender

I made the dough with The Fairy (you just add the ingredients then mix).

how to make salt dough

We then cut out the numbers/ stars, great counting practice.

homemade advent calender

You need to cook salt dough on a very low temp (gas mark 1/4) - the idea is to dry the shapes out, not bake them. Some people recommend to leave the shapes to air dry for a couple of days - I've never had very much luck with that and always end up finishing them in the oven (perhaps because I always make thick shapes or possibly as I'm not always very patient). Once dry you can then paint.

homemade advent calender

You maybe wondering why there is a dolls house at the start of this post, well the Fairy is totally in love with her dolls house - assembled and painted for her recent birthday by my lovely Dad (Thanks Dad!) The house inspired the purple and silver colour scheme we used to decorate the finished stars.

So the plan is each night of advent for myself or The Papa to hide a star in the dolls house. In the morning The Fairy can hunt for it and we can add it to our advent string.Where's the star hiding today?


This is a blog hop - check out the other blog hop co hosts to see what they have created.

Rainy Day Mum ~ Mummy Mummy Mum! ~ Life at the Zoo ~ Here Come the Girls
Do you have an Advent post? Link up your ideas below,